
For this week’s exercise in colorizing photographs, I chose another photograph of Vernon Hofacket, taken while serving on the southern US border in the US Army.
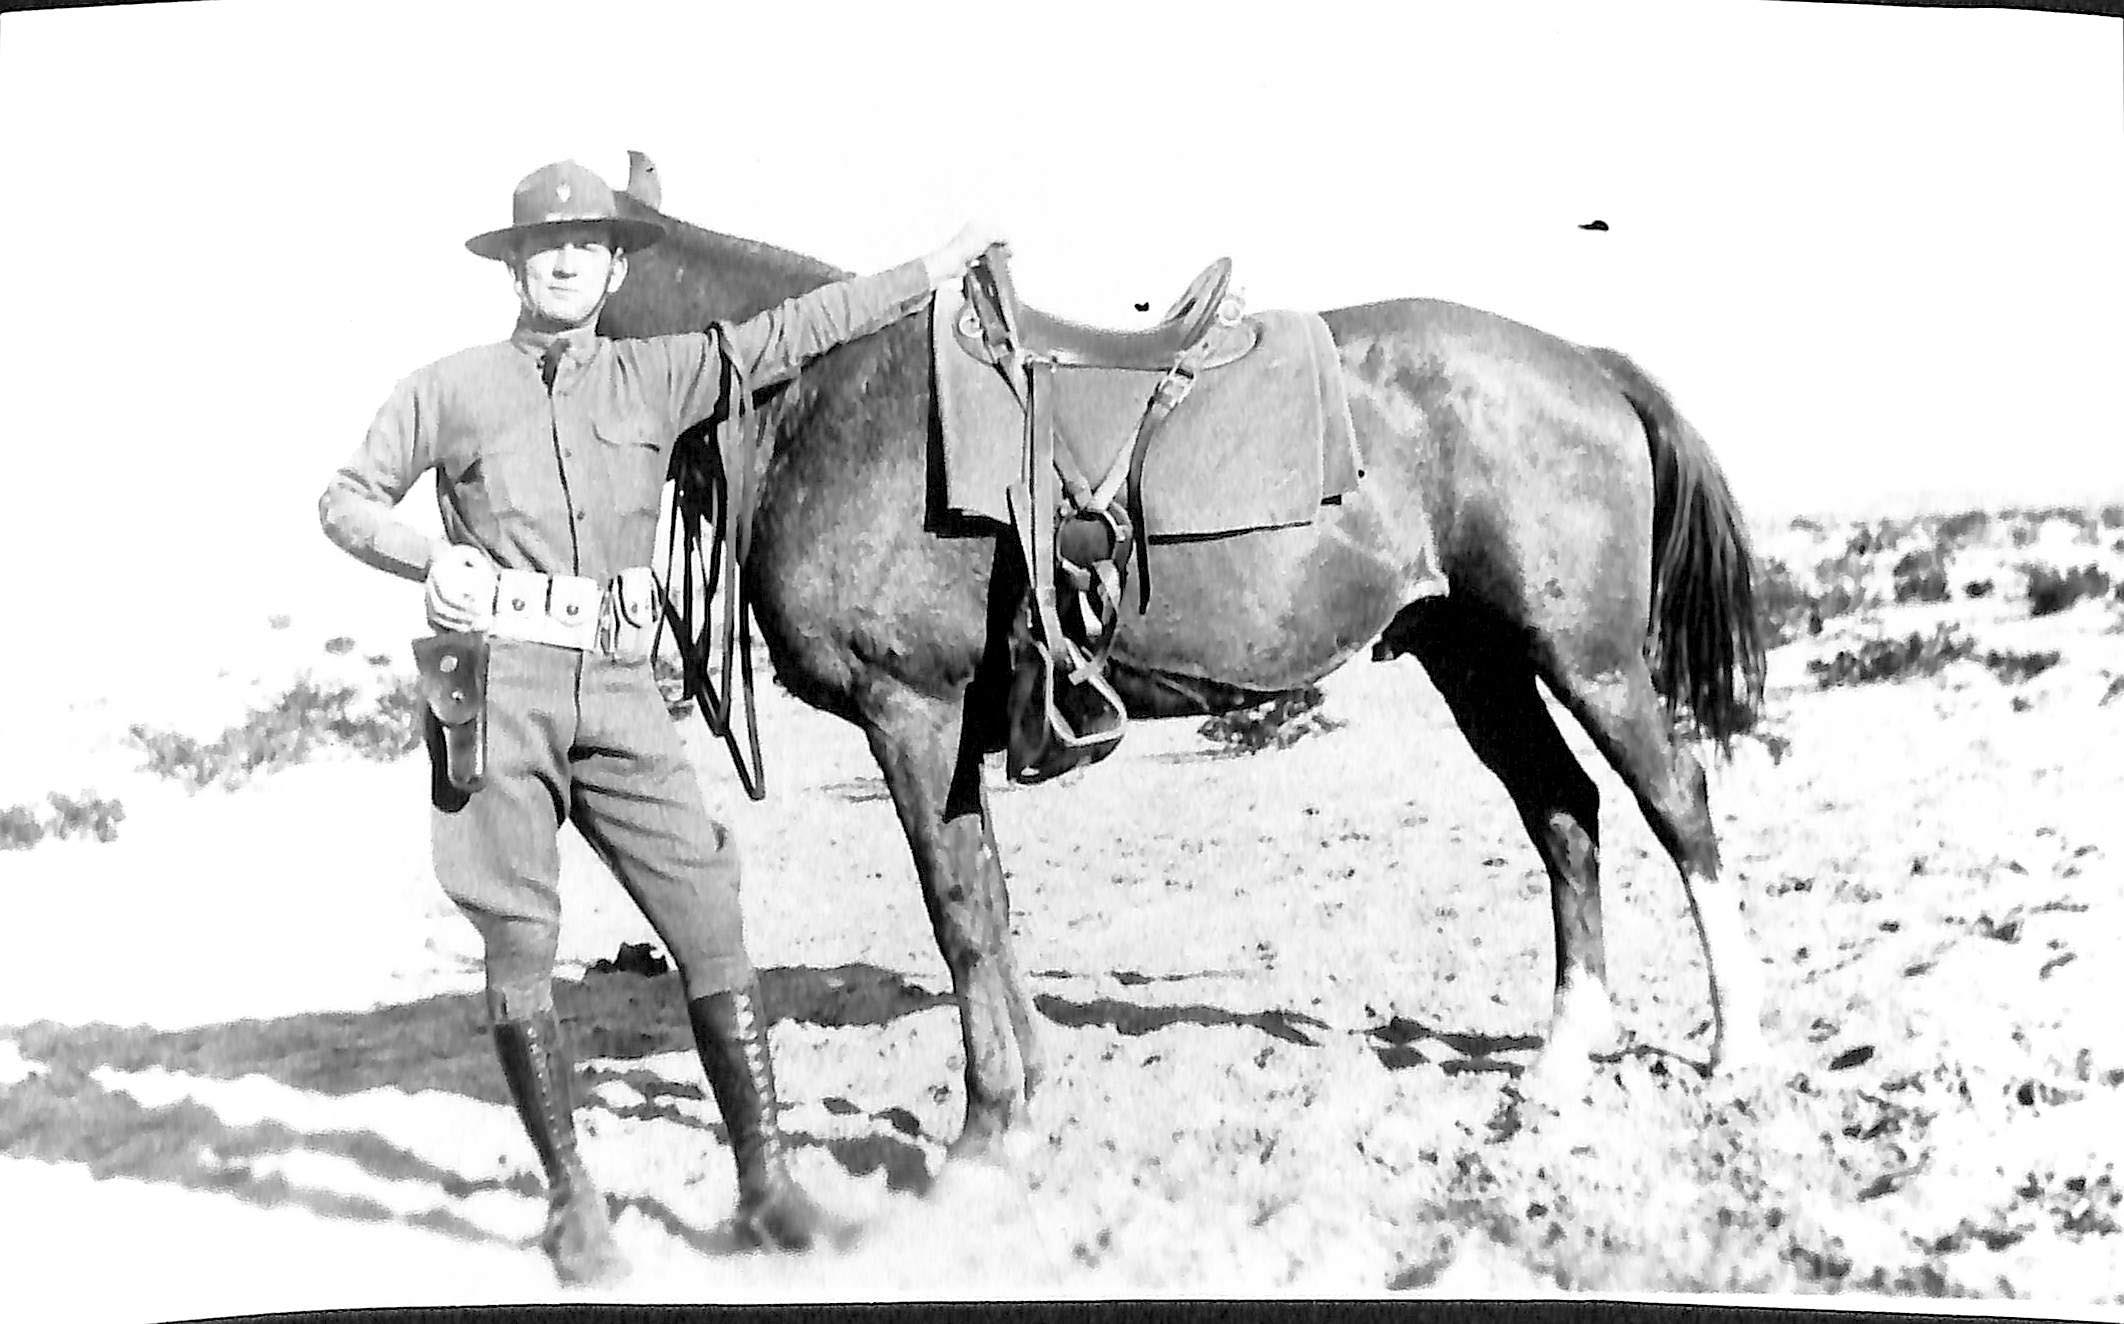
After doing some restoration work, I turned my attention to the challenge of selecting appropriate colors for the image.
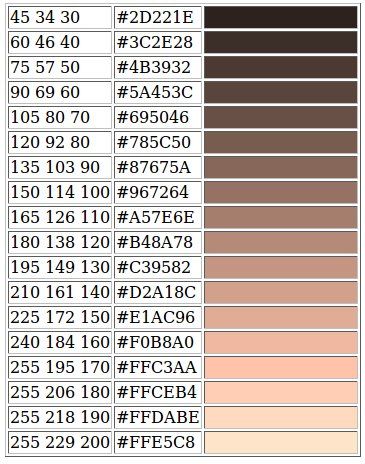
I discovered a basic skin tone palette from makehuman.org that got me off to a decent start. I discovered that I should use a much darker tone to start with, because they lighten considerably when opacity is reduced. Now that I’ve played with it a bit, I think I’ll load a more complex set to see if I can make a more realistic image. This set from DeviantArt seems to be popular.
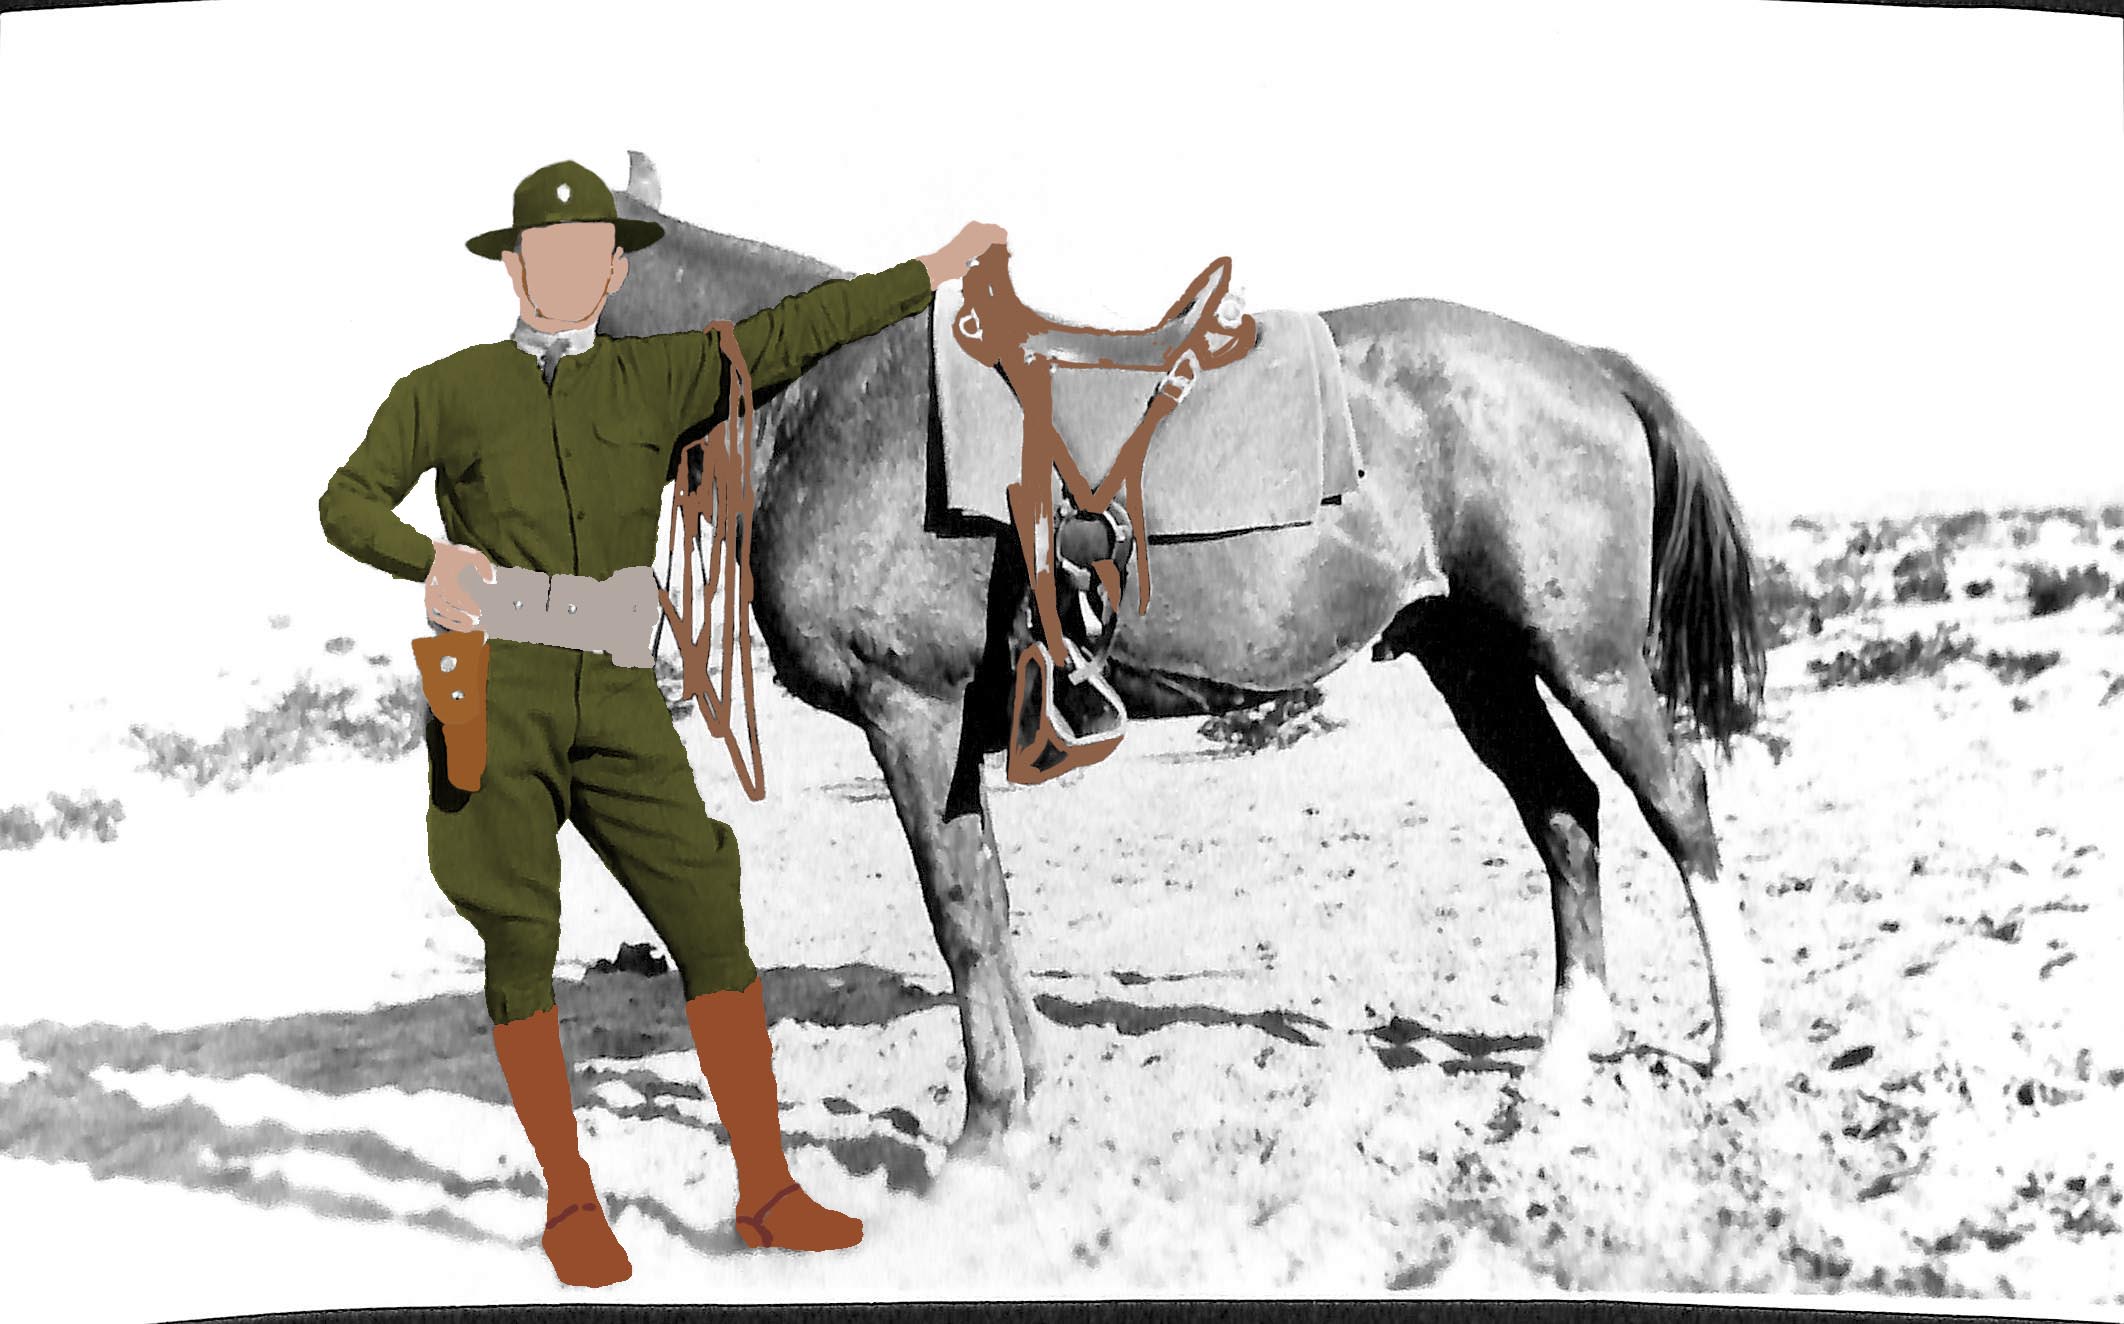
For the uniform parts and saddle leathers, I went hunting for quality images of artifacts from the era and then used them to sample colors. I played with the eyedropper tool to vary between point-selection and larger patches to get an overall color; I found that enlarging the sample patch helped to get a better color average for the item. I used different leather colors for pieces of the holster, boots, spurs, chinstrap, and saddlery to add natural variation.
This strategy worked out pretty well for everything except the ammunition pouches, which came out a flat clay that doesn’t look realistic. I had sampled a cleaner piece of a used set of pouches; I’ll sample something a little dirtier and see what I get.
I’d also like to figure out how to color in metallic pieces such as buttons, insignia, and parts of the saddle rigging.
 My technique for outlining and filling in spaces is a little different from the tutorials. Since I have a Wacom graphics tablet, I can zoom way in and trace the image to my liking. I color in at 100% opacity and then turn the base image off to ensure I’ve covered everything. It’s faster for me than the lasso tool and is a lot easier on the mouse hand. I’ll bring the tablet to class tonight.
I’m having a heck of a time with the right hand, which is blurred in the image. If anyone has ideas for fixing this, I’m eager to hear them.
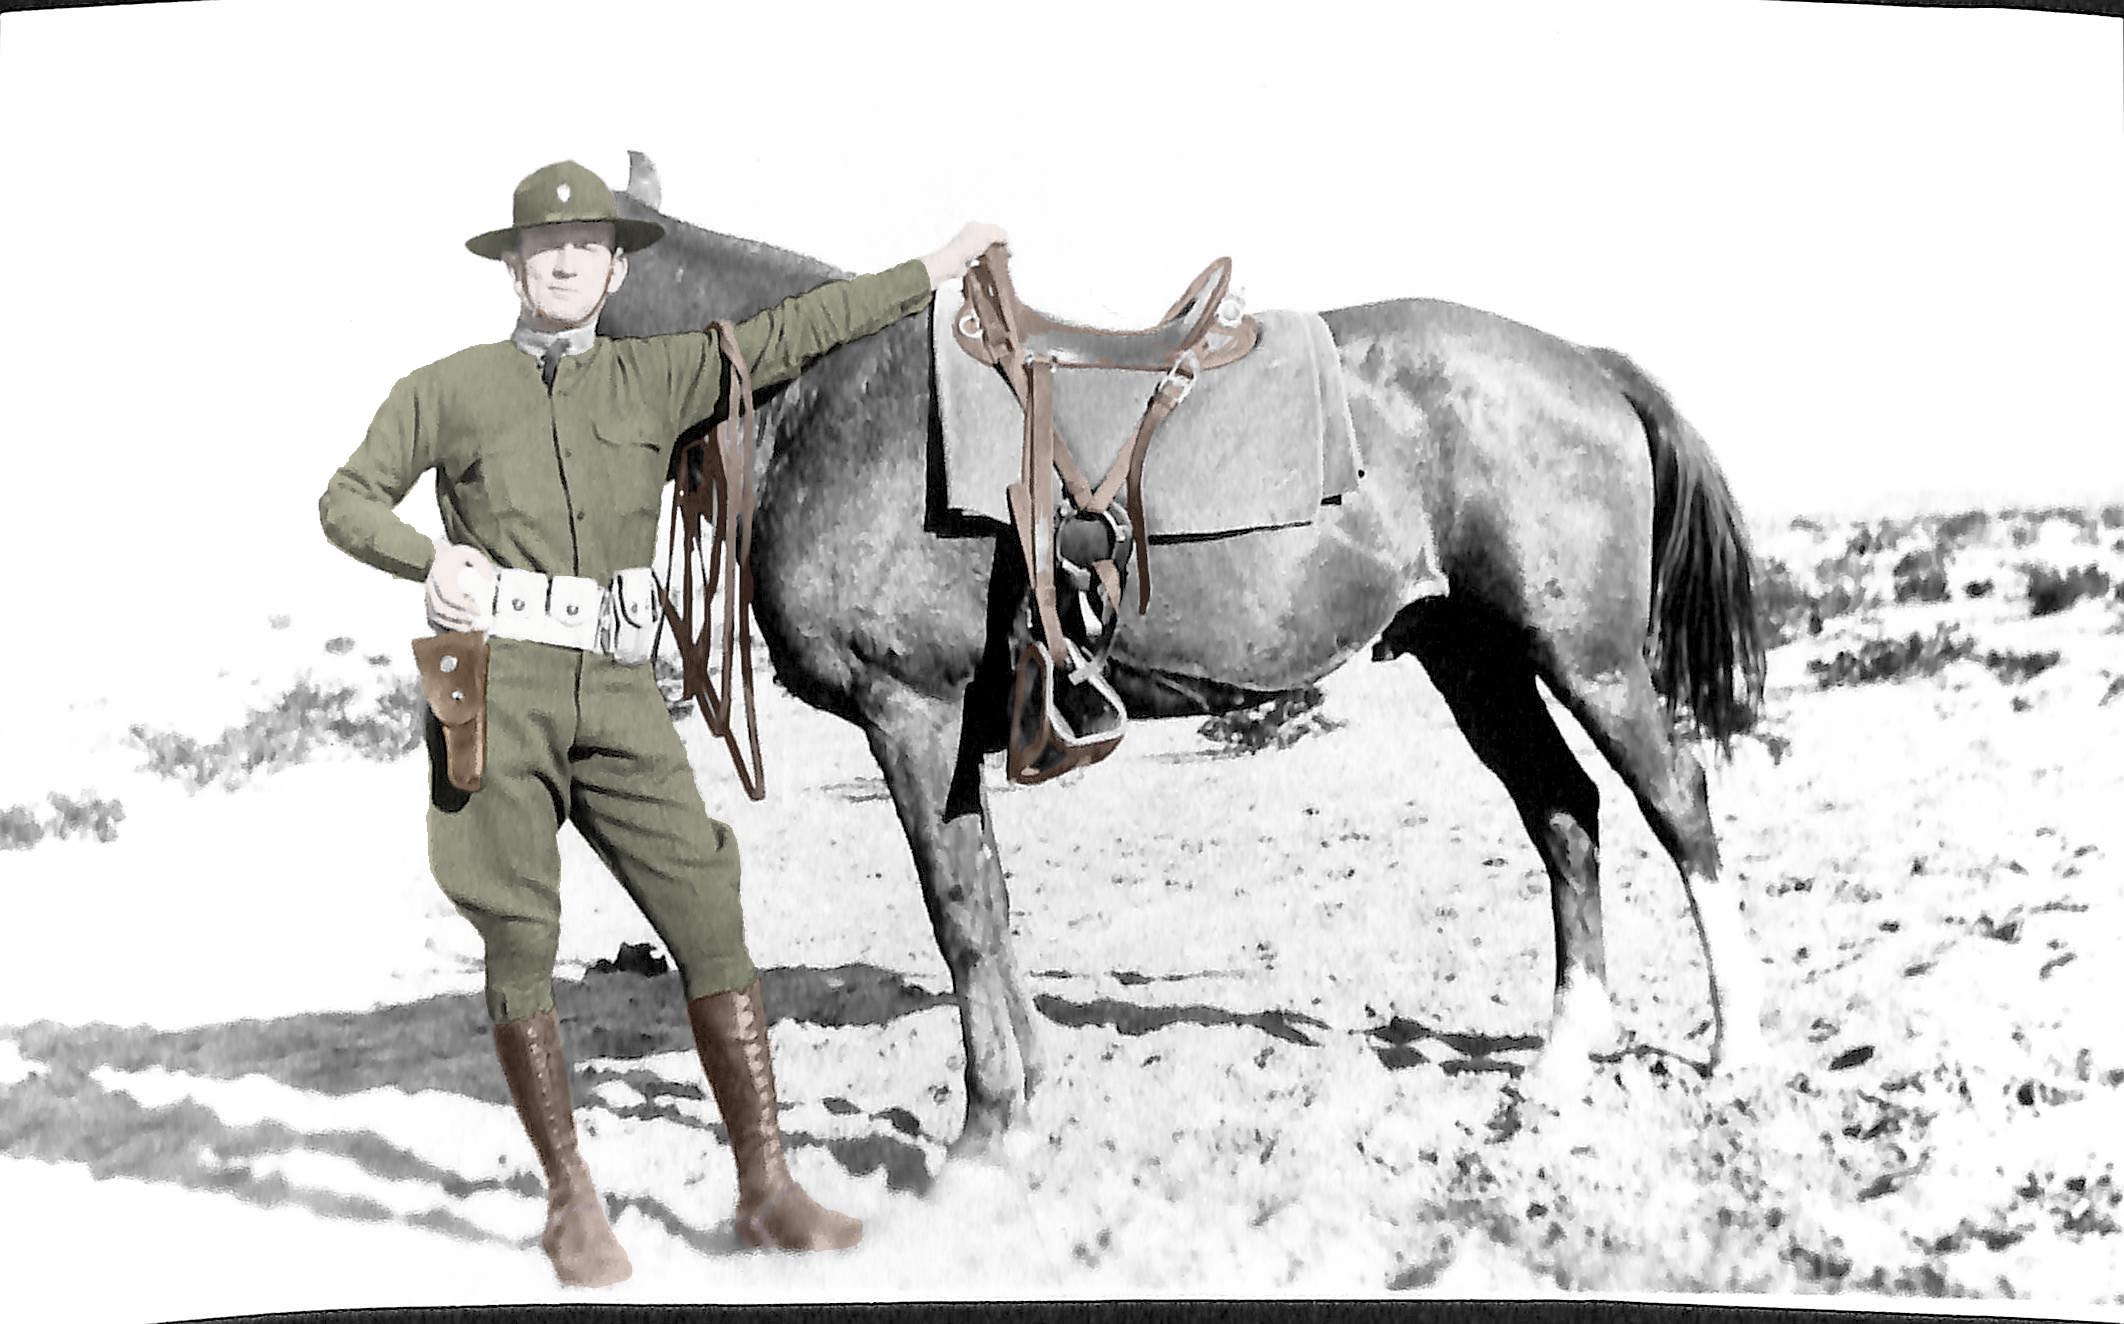
This is enjoyable work, but time-consuming. Here’s what I’ve done so far:
I’ve commented on Tamara’s, Kater’s, Mark’s, and Jenna’s blogs this week.

thanks for yet another great resource. What I did was took a photo with several people and made it a layer so I could refer to it and choose colors, like in the Lynda video. But I did need to darken it too, like you were saying. I also have trouble in some of the darker photos making the skin look real. I have to use the dodge tool to lighten features up sometimes.
Thanks for your comment on my post, Kim! It was super helpful and I really appreciate it! I think the color choices you picked are great; they’re not too bold and not too faded. Using a tablet does seem a lot easier than a mouse or (even worse) a laptop mousepad. Great work!
Looks great Kim. I see that your photo had sun glare as well. I had a very difficult time trying to counteract that effect. The colors that you added seemed to help that. I experimented with my photo in black and white for a long time before colorizing. Perhaps I should have tested out color first.